
Dialogue bubbles often appear in communication software. Compared with the contextual dialogue in the form of plain text, the use of dialogue bubbles can make the chat interface more vivid and interesting. Through extension, bubble skin can also be made, which can make the software personalized functions more abundant.
cs
public class ChatBubble : SelectableItemAttributes
| Property | Description |
|---|---|
| Role | Dialogue role |
| Type | Message type |
| IsRead | Read |
| ReadAction | Triggered when the bubble is selected |
Events
| Event |
|---|
| hc:ChatBubble.Selected |
| hc:ChatBubble.Deselected |
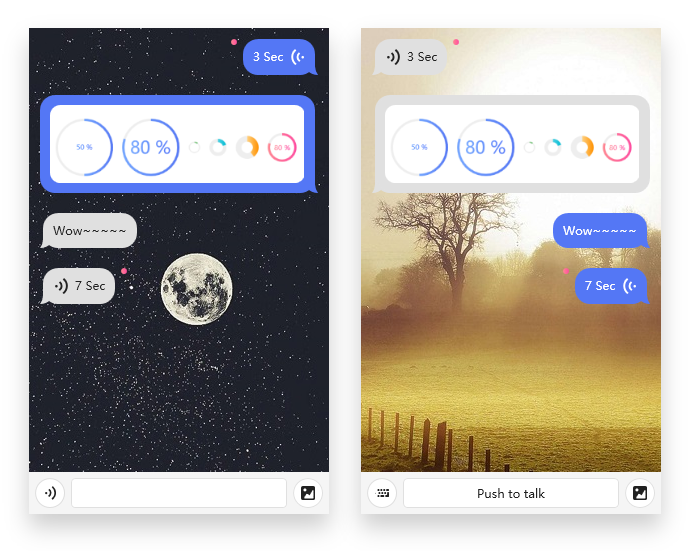
Case
example:
<ListBox Name="ListBoxChat" ScrollViewer.HorizontalScrollBarVisibility="Disabled" ScrollViewer.CanContentScroll="False" Background="Transparent" hc:ChatBubble.MaxWidth="300" BorderThickness="0" Style="{StaticResource StackPanelVerticalListBox}" ItemsSource="{Binding ChatInfos}">
    <ListBox.ItemTemplate>
        <DataTemplate>
            <hc:ChatBubble Role="{Binding Role}" Type="{Binding Type}" Content="{Binding Message}" Tag="{Binding}"/>
        </DataTemplate>
    </ListBox.ItemTemplate>
    </ListBox>
we need to create a model called ChatInfoModel
public struct ChatInfoModel
    {
        public object Message { get; set; }

        public string SenderId { get; set; }

        public ChatRoleType Role { get; set; }

        public ChatMessageType Type { get; set; }

        public object Enclosure { get; set; }
    }
we need a list for holding our items:
public ObservableCollection<ChatInfoModel> ChatInfos { get; set; } = new ObservableCollection<ChatInfoModel>();for sending string chat:
var info = new ChatInfoModel
{
    Message = "Hello",
    SenderId = _id,
    Type = ChatMessageType.String,
    Role = ChatRoleType.Sender
};
ChatInfos.Add(info);
sending image:
var dialog = new OpenFileDialog();
    if (dialog.ShowDialog() == true)
    {
        var fileName = dialog.FileName;
        if (File.Exists(fileName))
        {
            var info = new ChatInfoModel
            {
                Message = BitmapFrame.Create(new Uri(fileName)),
                SenderId = _id,
                Type = ChatMessageType.Image,
                Role = ChatRoleType.Sender,
                Enclosure = fileName
            };
            ChatInfos.Add(info);
        }
    }
sending audio:
var info = new ChatInfoModel
    {
        Message = "Audio",
        SenderId = _id,
        Type = ChatMessageType.Audio,
        Role = ChatRoleType.Sender,
        Enclosure = fileName
    };
    ChatInfos.Add(info);
for reading audio and image message we need to create a event called hc:ChatBubble.Selected:
<ListBox Name="ListBoxChat" hc:ChatBubble.Selected="ListBoxChat_Selected"...now in hc:ChatBubble.Selected event:
private void ListBoxChat_Selected(object sender, RoutedEventArgs e)
{
    if (e.OriginalSource is FrameworkElement element && element.Tag is ChatInfoModel info)
            {
                if (info.Type == ChatMessageType.Image)
                {
                    new ImageBrowser(new Uri(info.Enclosure.ToString()))
                    {
                        Owner = WindowHelper.GetActiveWindow()
                    }.Show();
                }
                else if (info.Type == ChatMessageType.Audio)
                {
                    var player = new SoundPlayer(info.Enclosure.ToString());
                    player.PlaySync();
                }
            }
}
NOTE
- You must specify the
ChatRoleTypeto specify theReceiverandSender - You must specify the
ChatMessageTypeto specify theMessage Type(String, Image, Audio, Custom)