Property
Name
MatrixDotSize
MatrixDotGap
IsMatrixSquare
ScrollSpeed
IsScrolling
ScrollDirection
Spacing
Angle
SegmentForeground
SegmentBackground
ColonForeground
ColonBackground
StrokeThickness
Stroke
Model
SymbolCount
IsColonBlink
Text
Models
Name
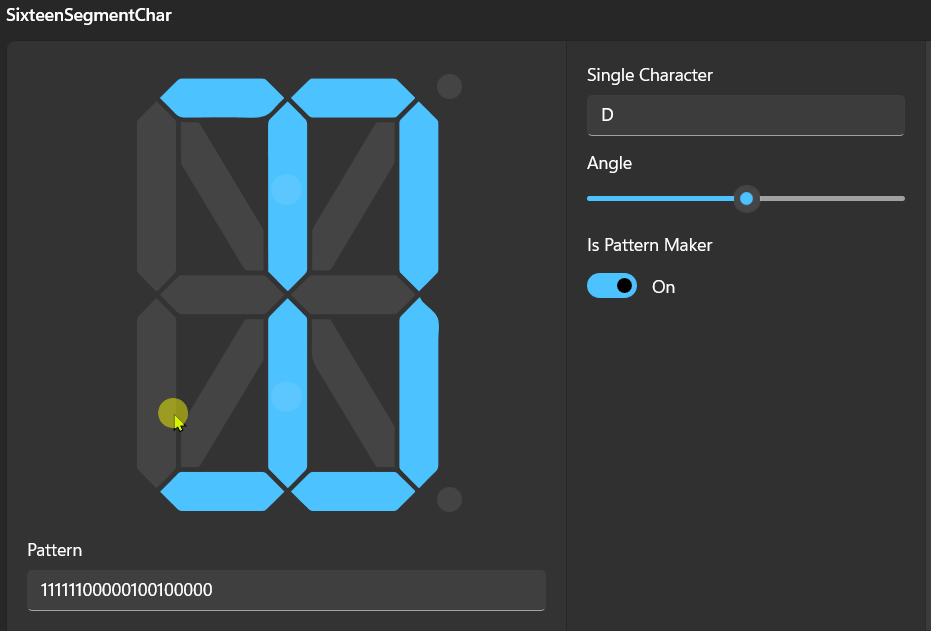
SixteenSegmentChar
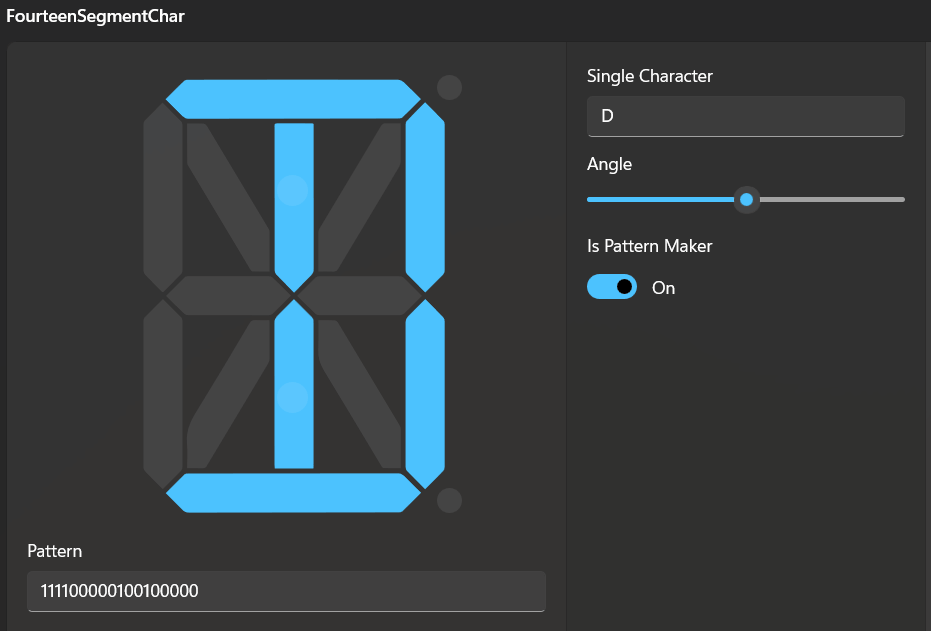
FourteenSegmentChar
Matrix5x7SegmentChar
Matrix5x8SegmentChar
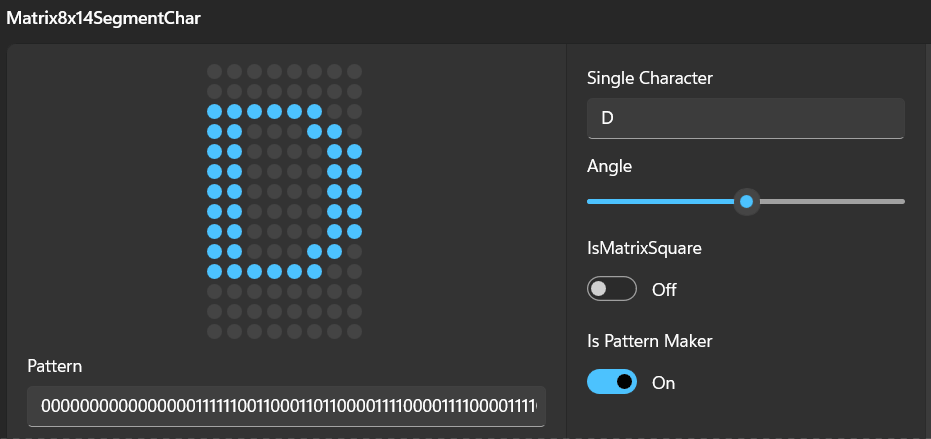
Matrix8x14SegmentChar
Styles There is some styles which can be applied to SixteenSegmentChar or FourteenSegmentChar
Name
WideFourteenSegmentCharStyle
WideSixteenSegmentCharStyle
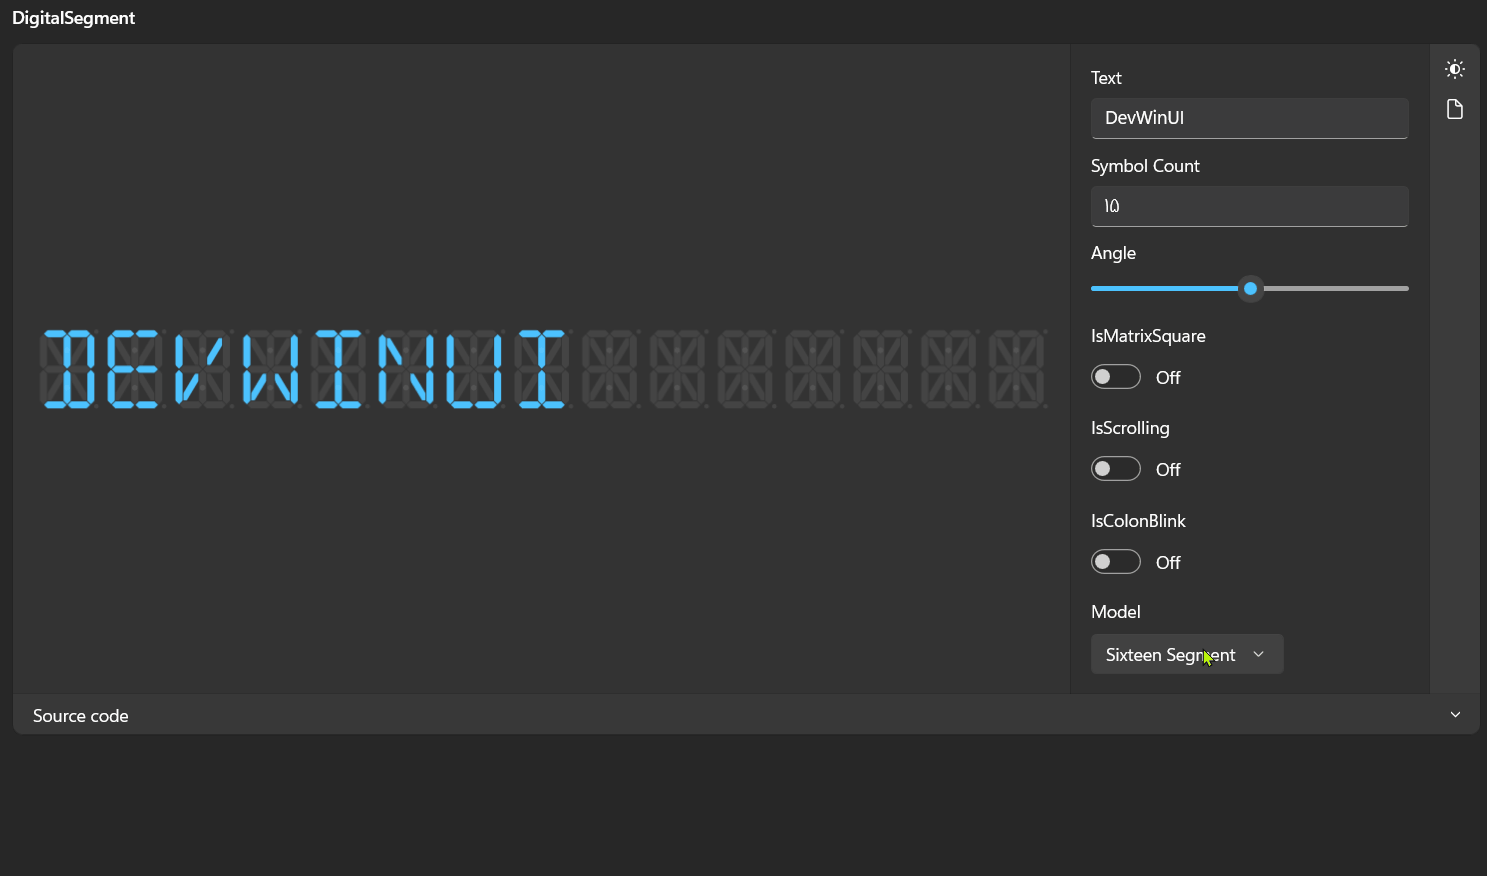
Example 1 2 3 4 5 <dev:DigitalSegment Text ="DevWinUI" > <dev:DigitalSegment.Model > <dev:SixteenSegmentChar > </dev:DigitalSegment.Model > </dev:Accordion >
Custom Model Currently, we provide some built-in models such as SixteenSegmentChar , FourteenSegmentChar , and MatrixSegmentChar (5x7, 5x8, 8x14).
Define Pattern Create a class and derive it from ISegmentPattern.
1 2 3 4 5 6 7 8 public partial class MySegmentPattern : ISegmentPattern { public static string DefaultPattern => "00000000000000000000" ; public static Dictionary<string , string > Patterns { get ; } = new () { { "A" , "11110011110000000000" }, } }
Here, you need to define your pattern, where 1 represents an active (filled) segment and 0 represents an inactive (not filled) segment.
You should add a pattern for every character you want to support. We’ll guide you on how to obtain these patterns later in this document.
Define new SegmentChar Create a new class and derive it from SegmentChar. if you want to create a matrix like segment, you should drive it from MatrixSegmentChar.
1 2 3 4 5 6 7 8 9 10 11 12 13 14 15 16 17 18 19 20 21 22 23 24 25 26 27 28 29 30 31 public sealed partial class MySegmentChar : SegmentChar {protected override IReadOnlyDictionary<string , string > PatternTable => MySegmentPattern.Patterns; protected override string DefaultPattern => MySegmentPattern.DefaultPattern; protected override void OnApplyTemplate () { base .OnApplyTemplate(); CollectSegments(); UpdateCharacter(); InitColonAnimation(); if (IsPatternMakerEnabled) { RegisterPointerEvents(); } } protected override void CollectSegments () { Segments = new () { ("A1" , GetTemplateChild("PART_SegmentA1" ) as Path), ("ColonTop" , GetTemplateChild("PART_SegmentColon1" ) as Ellipse), ("ColonBottom" , GetTemplateChild("PART_SegmentColon2" ) as Ellipse), }; } public override SegmentChar Clone () { return new MySegmentChar(); } }
You should populate the Segments collection with your segments.
Matrix Example 1 2 3 4 5 6 7 8 9 10 11 12 13 14 public partial class MyMatrixSegmentChar : MatrixSegmentChar { protected override int MatrixColumns => 5 ; protected override int MatrixRows => 7 ; protected override IReadOnlyDictionary<string , string > MatrixPatternTable => MySegmentPattern.Patterns; protected override string MatrixDefaultPattern => MySegmentPattern.DefaultPattern; public override SegmentChar Clone ()new MyMatrixSegmentChar(); public MyMatrixSegmentChar () { DefaultStyleKey = typeof (MyMatrixSegmentChar); } }
Define your template Define your template. If you want to use colon animations and related features, you should name the segments ColonTop and ColonBottom.
1 2 3 4 5 6 7 8 9 10 11 12 13 14 15 16 17 <Style TargetType ="local:MySegmentChar" > <Setter Property ="Template" > <Setter.Value > <ControlTemplate TargetType ="local:MySegmentChar" > <Grid Width ="280" Height ="350" Margin ="10" > <Path x:Name ="PART_SegmentA1" Data ="..." Fill ="{TemplateBinding SegmentBackground}" Stroke ="{TemplateBinding Stroke}" StrokeThickness ="{TemplateBinding StrokeThickness}" /> </Grid > </ControlTemplate > </Setter.Value > </Setter > </Style >
if you are drived it from MatrixSegmentChar, you should define your template like this:
1 2 3 4 5 6 7 8 9 10 11 12 13 14 15 16 <Style TargetType ="local:MySegmentChar" > <Setter Property ="SegmentForeground" Value ="{ThemeResource AccentAAFillColorDefaultBrush}" /> <Setter Property ="SegmentBackground" Value ="{ThemeResource DividerStrokeColorDefaultBrush}" /> <Setter Property ="Angle" Value ="-5" /> <Setter Property ="Template" > <Setter.Value > <ControlTemplate TargetType ="local:MySegmentChar" > <Canvas x:Name ="PART_Canvas" > <Canvas.RenderTransform > <SkewTransform AngleX ="{Binding Angle, RelativeSource={RelativeSource Mode=TemplatedParent}}" AngleY ="0" /> </Canvas.RenderTransform > </Canvas > </ControlTemplate > </Setter.Value > </Setter > </Style >
Usage Now you can use it like this:
1 2 3 4 5 <dev:DigitalSegment > <dev:DigitalSegment.Model > <local:MySegmentChar > </dev:DigitalSegment.Model > </dev:DigitalSegment >
How to Generate Pattern? Once you’ve created your segments, you can use them and set IsPatternMakerEnabled to true. This allows you to click on the segments and obtain a pattern.
1 <local:MySegmentChar x:Name ="MySeg" IsPatternMakerEnabled ="True" PatternChanged ="OnPatternChanged" PointerPressed ="OnPointerPressed" >
1
2
3
4
5
6
7
8
9
10
11
12
private void OnPatternChanged (object sender, SegmentEventArgs e{ Debug.WriteLine(e.Pattern); } private void OnPointerPressed (object sender, PointerRoutedEventArgs e{ if (e.OriginalSource is Shape shape) { MySeg.ToggleSegmentState(shape); } }
Demo you can run demo and see this feature.